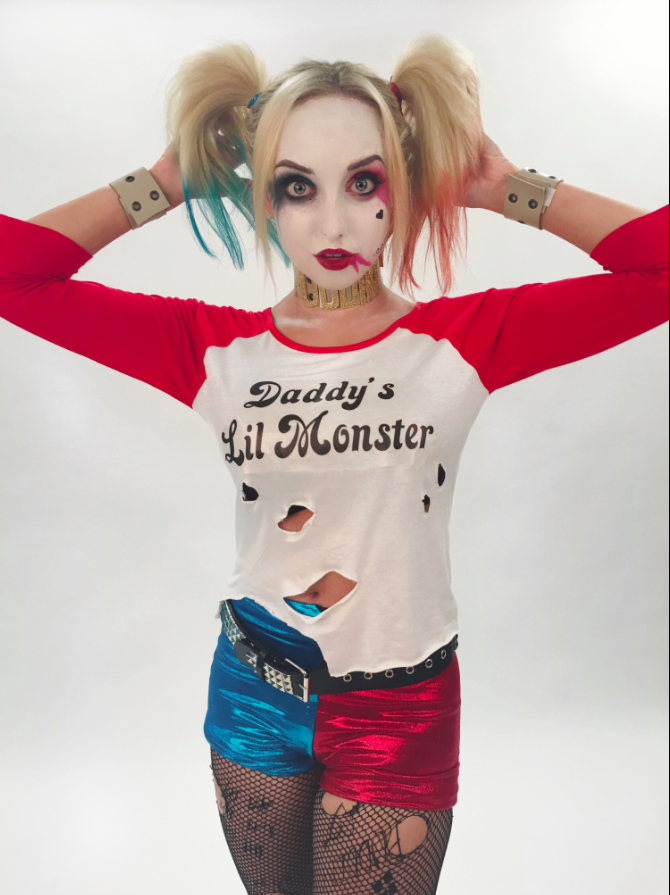
All of the products you’ll need to create this costume are linked throughout the piece.
Harley Quinn Shirt
Supplies
Red baseball shirt
Iron-on paper
Directions
- Using the font Jezebel, which you can download here, type out the words “Daddy’s Lil Monster.” Make the font large enough to fit an entire sheet of paper in landscape.
- Print out a MIRROR REFLECTION of your text onto your iron-on paper. This is important so it appears in the right direction.
- Cut the text out as close as possible to the letters without cutting into them, so you have as small an edge as possible.

- Iron your shirt, and iron the text onto it for 90 seconds. Allow to fully cool before peeling.

- Cut very tiny holes, as needed into the shirt. Using your fingers, rip them to desired size.
Harley Quinn Shorts
Supplies
An old pair of biker shorts (or booty shorts if you’re comfortable with a shorter length), or leggings that can be cut into the right shape.
Half a yard of metallic red stretchy fabric
Half a yard of metallic blue stretchy fabric
Fabric Fusion
Scissors
Paintbrush
Glue Gun
Directions
- Fold your red fabric in half, so the metallic side is face up. Take your shorts, and fold them in half, then place them up against the folded edge to trace them, leaving excess room around all the edges

- Cut the fabric starting at the fold, so that when you are finished cutting, it doubles (and will cover both the front and back of your shorts.
- Using a paintbrush, apply fabric fusion all over the shorts and adhere the fabric.


- Allow to dry overnight.
- Repeat the process with the other color fabric for the second half of your shorts.
- To clean up the edges, fold the fabric inside the waistband and leg holes of your shorts and glue them down. We used hot glue, but this made the shorts tighter, so make sure you stretch the fabric before applying the glue.
- Fold the excess fabric in the center of the seam over itself to create the illusion of a new seam. Glue it down.

Harley Quinn Choker and Bracelets
Supplies
An old belt in gold, beige, or white
Gold scrapbooking letters
Hot Glue
Velcro
Directions
- Measure the belt so it’s wraps around your neck with a little room to spare and cut.
- Hot glue the word “PUDDIN” to the choker.

- Apply Velcro to each edge of the choker to put it on. (One piece of velcro should be on the SAME side as the letters, and the other piece should be on the back side.)

- Repeat process for wrists to make bracelets (without gluing the letters down.
You’ll Also Need
Fishnets
Studded belt
Black booties, or White and Black Adidas, or Converse
